Showing posts with label how to. Show all posts

Thursday, 16 August 2012

How to: 1950's Pin Up Look

Debs season kicked off this week for me. I had the pleasure of doing gorgeous Jessica's hair and makeup. Jess is my boyfriends sister, so basically like a little sister to me :) 

We opted to do a 50's inspired look as we thought we needed something classy and elegant to go with her dress. She suited the look down to a tee. This look can be used for bridal looks too. (It's a personal favourite of mine!) 


How to get Jessica's 1950's look: 
  • For a debs makeup, we need the makeup to be long lasting. Jess has oily skin, so I began with a silicone primer, Smashbox Photo Finish 
  • For foundation, I used MAC Matchmaster foundation in shadde 3.0. I blended this down the neck to make sure it was all blended in properly. 
  • For contour, I used MAC Studio Sculpt Foundation in NC45. I think using a darker foundation can look better as it looks more natural.
  • For concealer, I used Collection 2000 lasting perfection concealer in Medium. I popped this under the eyes in a V shape, รก la Kim Kardashian!
  • For brows I used Mystery eyeshadow from MAC. Jess has strong brows anyway, so we just needed to fill in any gaps. (Major brow envy!) 
  • On the eyes, I used Urban Decay Primer Potion, then I packed Brule eyeshadow onto the lid for a matte base. 
  • Through the crease I used 3 shadows. I began lightly buffing Copperplate eyeshadow from  to create a natural shadow. Then I put Espresso over the top, and finally to darken it even more, I put a teeny tiny bit of Handwritten on top. I used Nylon eyeshadow as an inner tear duct highlight and as a brow bone highlight.
  • For liner I used Inglot Gel Liner in 77. I did a medium flick with it. ( I used a MAC 210 brush!)
  • On the lips I used Dubbonet Lipstick from MAC as a base, blotted, then applied Russian Red from MAC over the top. We applied around 6(!!) layers of lipstick (blotting in between each later.) I used Lipcote Lipstain over the top to make sure it stayed all night. 
  • For blush I used Suede Blush from Sleek, mixed with a bit of Dainty from MAC
  • I powdered the skin with Laura Mercier Translucent Powder.  


Top tips for Debs Makeup:
  • THE MOST IMPORTANT RULE EVER!: Please for the love of god make sure your foundation doesn't contain a high SPF. It will flash back light and make you look like a ghost! 
  • Use long wearing products!
  • If you're wearing tan, match it to your chest, you'll be one uniform colour then! 


Hope everyone who's going to a debs has a great time! :) 

For more tips, tricks and bookings for debs/weddings check out my Facebook Page :) 


LauraLou
xx


Monday, 30 July 2012

How To: Perfect Brows


Brows are the key to completing any look. Below is how I do mine. PLEASE for the love of god do not go overboard with the shape!!


I know, they're measly!! 

Fill in the "body of the brow, do not go straight to the front with a heavy hand. Fill in the front part with upward feathery motions


Fill in the underside and tail of the brow, to get a defined shape.

Brows should begin here

Arch at the outside of your pupil.

Tail should end at this point.


I know this is very concise, but there isn't much more to do it! You can't dramatically change the shape of your brow without blocking it out. Go with what you have! :)


Products:
MAC 263
MAC Omega Eyeshadow

Monday, 16 July 2012

How To: Flicked Liner

Riiight, so liquid/gel liner. Tis a toughy. It takes patience (a lot) and practice :)
The liner I'm using today is Rimmel Glam Eyes. I really like it, but you kind of have to master gel first to then move onto liquid as gel has less slip than liquid. (My favourite gel liner is Inglot no. 77!) 

The best way to do liner is by looking down into a mirror! 
To start liner, take your brush, make sure all the bristles are in the correct place, you can do this by rolling the brush on your hand in the product. 

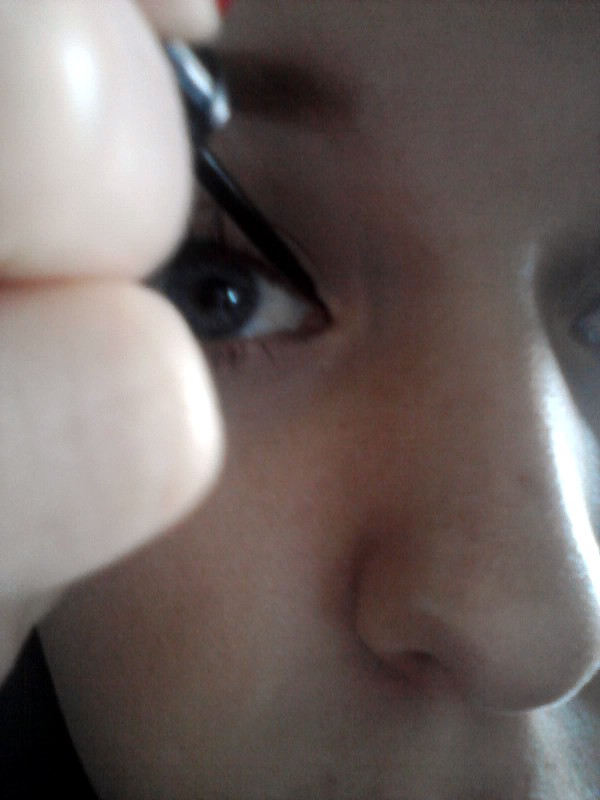
Place your brush flat in the middle of your top lashes. We do this just in case there's a huge blob of product, it wont end up on your inner corner! With short small stroke begin to edge towards your tear duct. Rest your baby finger on your face for support. If you need to, place your arm down on a table for stability.


When we get to our tear duct, aim the brush for almost the upper water line (where we would tight line) This will help to keep the liner thin. Again- do this in short strokes. 


When we have got the liner in the tear duct, go and do the other eye. Only do 2/3 of the liner.  This will keep the lines symmetrical. When we have the lines the same,  head towards the flick.  Your flick should go between where the top and bottom lashes meet, follow the line on your bottom lash line upwards, this is where the liner should go. Your liner shouldn't hit your socket bone, if it does, its too long. 
If you struggle with this part, map it out with some white kohl pencil, this will rub out easily when you have the line prefected! 


To actually create the flick, draw a line back in on itself towards the lash line. Leave around 1mm of space at the top for a sleek looking flick. Fill this gap in. and connect the joining line. There shouldn't be too much space left to fill as the top line would have filled some of the gap.


Et viola! Flicked liner! 


Hope  someone found this helpful. Let me know if you have any tips for liner? 

LauraLou
xx


P.S - sorry for the shitty pictures, this was A LOT harder to capture than you'd think!!